We can try several different methods to unhide these files, each method is provided below with a step by step guide.
Method 1
This method is our first attempt at an automatic method, using a tool from Bleeping Computer called UnHide. You can download and run this tool and it will attempt to automatically bring back the hidden files.
1. Download the program from here: UnHide
2. After it has completed downloading, double click on the file to run it.
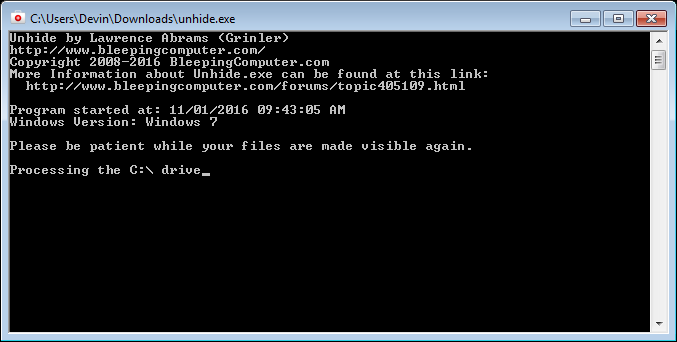
3. You will see a command prompt window open, please wait while the program runs (See photo below).
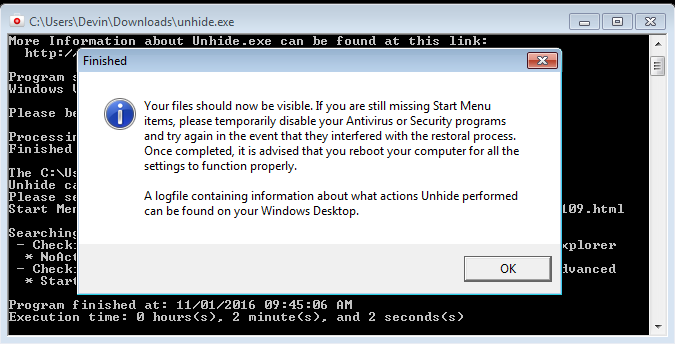
4. When the program finishes you will see the following message (See photo below).
That’s it! You’ve completed the steps for the first method, if it was successful your files should no longer be hidden.
Method 2
This method is for users who are using Windows 7 or Windows Vista. Scroll down for Method 2 instructions on Windows XP.
1. Check if folder C:\Users\user_name\AppData\Local\Temp\smtmp exists. You’ll replace “user_name” with the username on your computer, for instance mine is Devin (See photo below).

2. Now that we’ve found that folder, copy all content of this folder:
C:\Users\user_name\AppData\Local\Temp\smtmp\1
3. Now navigate to the path below, and paste all of the content from above into this folder:
C:\Program Data\Start Menu
**Important Note Section**
Start Menu can often be a hidden folder because it is a system folder. In order to unhide it follow the steps below. You may also need to take ownership of the folder in order to access it, the steps below outline this process as well.
1. Open the File Explorer if you don’t have it still open from above.
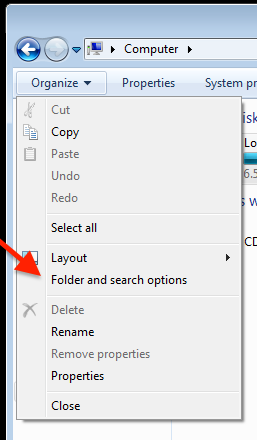
2. Go to Folder Options (Getting here may be different depending on if you’re using Vista or Windows 7, see photo below for Windows 7).
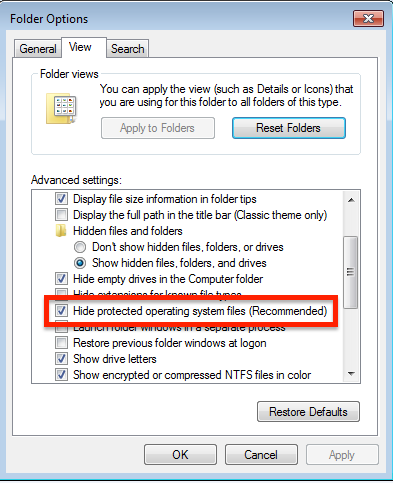
3. Click on the view tab, and look for “Hide protected operating system files”, uncheck the box next to it.
Now we are going to take ownership of the Start Menu folder.
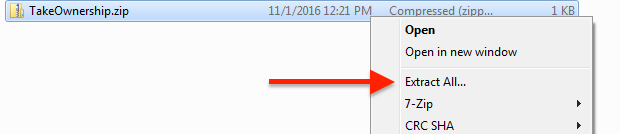
1. Download the zip file from HowToGeek here: TakeOwnership.zip
2. After the download has finished, right click on the downloaded zip file and choose “Extract All” (See photo below).
3. After extracting you should see two entries, one to install and one to remove. Double click the Install file, and click Okay on all dialog boxes that pop up.

4. After the file installs you can now simply Right click to take ownership of a folder.
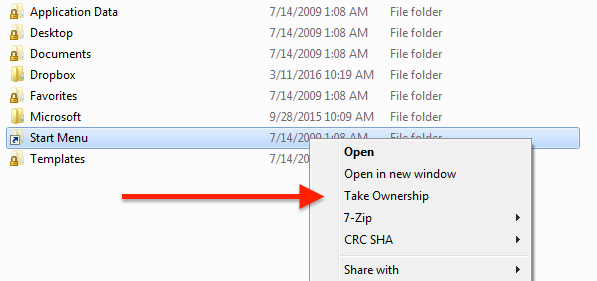
5. Navigate back to C:\Program Data and right click on the folder Start Menu, choose “Take Ownership” and wait for the program to run. After it has finished you will have access to the folder.
6. Move back up above the Important Note section and copy the information from Step 2, to paste into the Start Menu Folder in Step 3. The steps are also below:
2. Now that we’ve found that folder, copy all content of this folder:
C:\Users\user_name\AppData\Local\Temp\smtmp\13. Now navigate to the path below, and paste all of the content from above into this folder:
C:\Program Data\Start Menu
** End of Important Note Section**
4. Copy all content of this folder:
C:\Users\user_name\AppData\Local\Temp\smtmp\2
5. Paste it into the following folder:
C:\Users\user_name\AppData\Roaming\Microsoft\Internet Explorer\Quick Launch
NOTE. “Quick Launch” is also a system folder, so you may need to right click it and take ownership as you did with Start Menu.
6. Copy all content of this folder:
C:\Users\user_name\AppData\Local\Temp\smtmp\3
7. Paste it into the following folder:
C:\Users\user-name\AppData\Roaming\Microsoft\Internet Explorer\Quick Launch\User Pinned\TaskBar
8. Copy all content of this folder:
C:\Users\user_name\AppData\Local\Temp\smtmp\4
9. Paste it into the following folder:
C:\Program Data\Desktop
NOTE. “Desktop”is also a system folder, so you may need to right click it and take ownership as you did with Start Menu.
That’s it, you’re done with Method 2 for Windows 7 or Windows Vista.
Method 2
Windows XP
IF folder C:\Documents and Settings\user_name\Local Settings\Temp\smtmp exist…
**Please move to the important note section above in red to unhide system folders and take ownership, then continue with the steps below. If you can’t access a folder you need to right click it and choose take ownership**
1. Check if folder C:\Documents and Settings\user_name\Local Settings\Temp\smtmp exists. You’ll replace “user_name” with the username on your computer, for instance mine is Devin. So my path would be C:\Documents and Settings\Devin\Local Settings\Temp\smtmp
2. Copy all content of this folder:
C:\Documents and Settings\user_name\Local Settings\Temp\smtmp\1
3. Paste them into the following folder:
C:\Documents and Settings\All Users\Start Menu
4. Copy all content of this folder:
C:\Documents and Settings\user_name\Local Settings\Temp\smtmp\2
5. Paste them into the following folder
C:\Documents and Settings\user_name\Application Data\Microsoft\Internet Explorer\Quick Launch
6. Copy all content of this folder:
C:\Documents and Settings\user_name\Local Settings\Temp\smtmp\3
7. Paste them into the following folder:
C:\Documents and Settings\user_name\Application Data\Microsoft\Internet Explorer\Quick Launch\User Pinned\TaskBar
8. Copy all content of this folder:
C:\Documents and Settings\user_name\Local Settings\Temp\smtmp\4
9. Paste them into the following folder:
C:\Documents and Settings\All Users\Desktop
That’s it, you’ve completed Method 2. You’re files should be restored now.
Method 3
If the above methods have no worked, you can download the tool that corresponds with your operating system from Bleeping Computer below.
These are to restore the defaults for the start menu, accessories, and administrative tools.
Windows 2000 US English
http://download.blee…00-sm-reset.exe
Windows XP Pro 32-bit US English
http://download.blee…it-sm-reset.exe
Windows Vista 32-bit US English
http://download.blee…32-sm-reset.exe
Windows Vista 64-bit US English
http://download.blee…64-sm-reset.exe
Windows 7 32-bit US English
http://download.blee…32-sm-reset.exe
Windows 7 64-bit US English
http://download.blee…64-sm-reset.exe
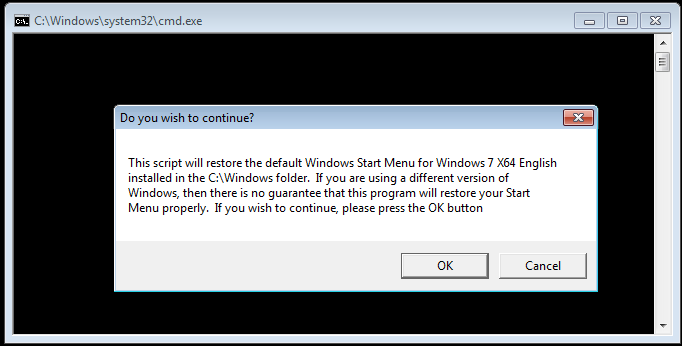
Simply download the tool from Bleeping Computer and Double click to run it. See the image below for an example of the above tools running in Windows 7.
You can manually recreate “All Programs” entries in the start menu by using the steps below
1. Download AppPaths
2. Double click on the downloaded file and choose run in the dialog box that pops up.
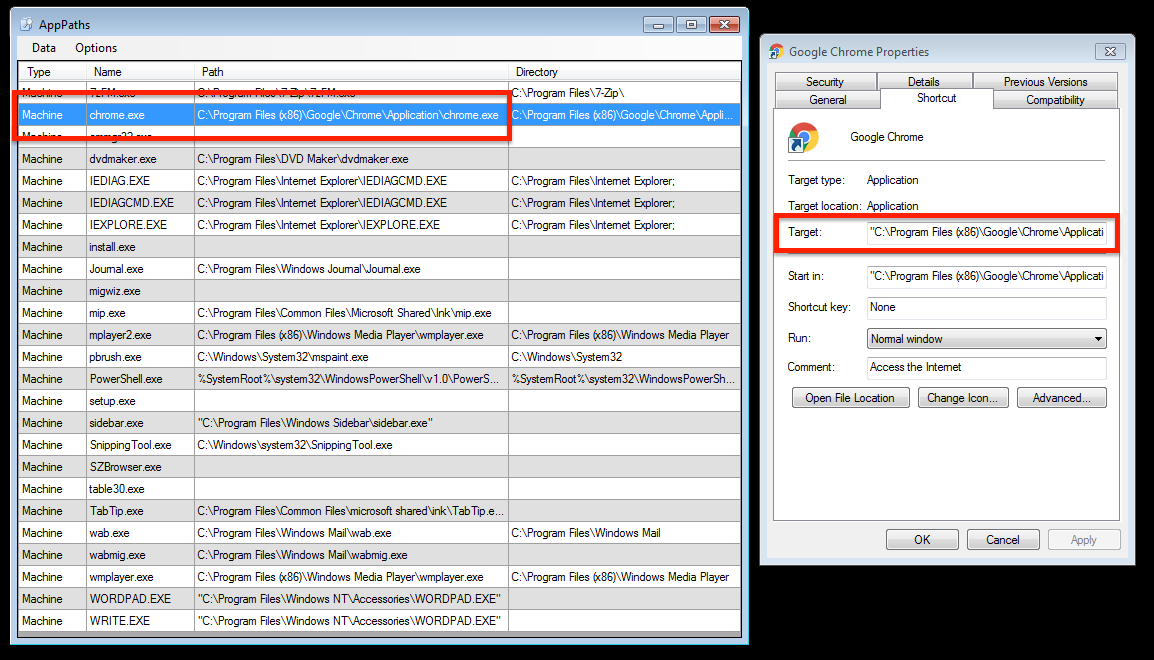
3. The program should look similar to the photo below, keep it open while we proceed.
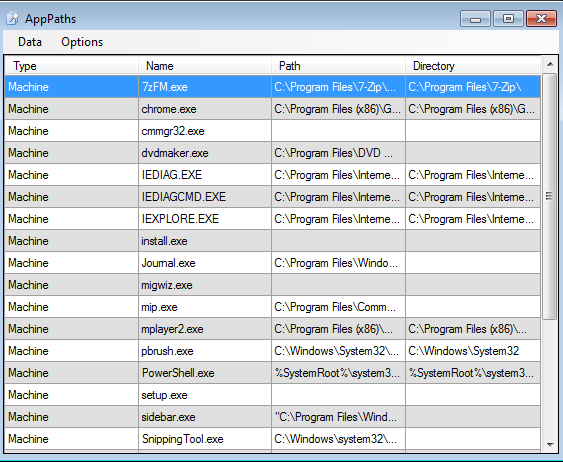
4. In the example below we’ll recreate the entry for the Chrome browser. Right click on the program that needs to be fixed and choose properties (See image below).
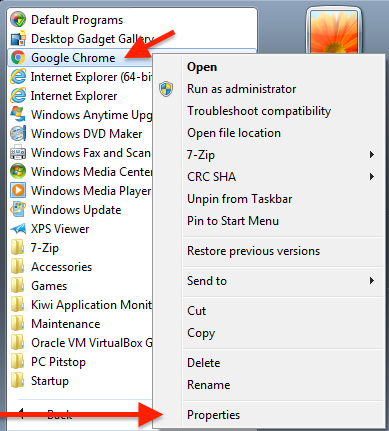
5. You will see a properties window open for Chrome, make sure you’re in the Shortcut tab and find the target box.
6. The Target box will be empty, which is why the shortcut is not working.
7. Now, look for Chrome.exe in the list on the AppPaths window, and copy the entry for Path into the target box (See photo below).
8. Click on Apply and OK, and you’re done! The start menu shortcut should be working again. You will need to do this for each program that is not working.