Your Computer Never Performed Like This
My work laptop is starting to get up there. She’s over 3 years old, and some time last fall I noticed she was starting to run a little slow. Start up was slow, task performance was slow, and shut down was painfully slow.
A lot of the time people assume when their computer slows down that it’s time for a new one. Even well maintained machines start to slow as they age (don’t we all!) But there is a cheaper solution than buying a brand new computer.
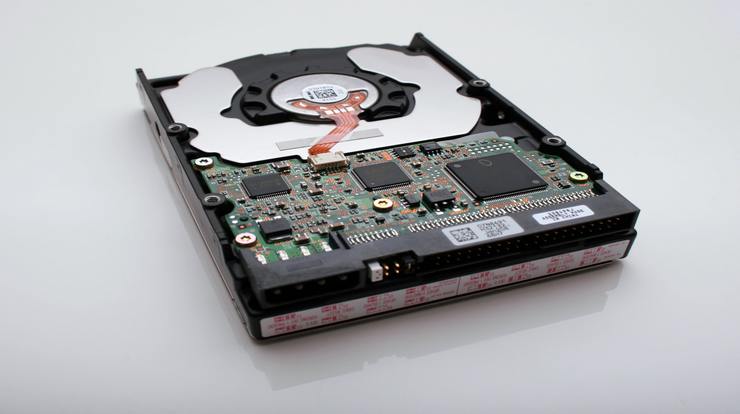
Get yourself a Solid State Drive (SSD). “What’s an SSD,” you ask? I’ll let our friend, Bob Rankin, explain it in detail. Essentially though, it’s a faster kind of hard drive.
Once I switched out my hard drive for an SSD, my laptop was better than new. The 5 minute start up time is less than 30 seconds now. I don’t need to worry about running multiple programs. Even executing heavy processing isn’t an issue. When I upgraded my personal laptop to a MAC, I dropped some extra money on an SSD external hard drive for that as well. Needless to say, I’m a fan.
So should you upgrade to an SSD? Well, Bob has an article for that too. Once you’ve made the decision to go forward, you’ll need to know how to swap it out.
Before You Open The Computer
Ok, you’ve made the decision to swap out your hard drive. Now it’s time to open up the back of your computer and feel like a total tech superstar. But wait! There are some things you need to do first.
The SSD you purchased doesn’t have your files, folders, pictures, or even an operating system. If you plug it in without cloning your current hard drive, it’ll be useless. Like a storage unit with nothing in it.
First, make sure your current storage will fit on the new drive. It’s likely that most of you aren’t storing terabytes of data, but you’ll want to check to see that everything will migrate without issue. This is fairly easy.
Go to your Start Menu > Settings > System > Storage and your used and free space. You’ll want to make sure your new SSD has more storage than what you’re currently using.
Next, you’re going to want to clone your hard drive. Let’s visit our friend Bob Rankin again for a quick breakdown on how to do that. When I cloned mine, it took a few hours (remember, my hard drive was running out of gas.)
Once your entire drive is cloned onto the new SSD, it’s time to play Operation: Computer Edition.
Get A Look Inside
Next, it’s time to open up your computer. This is going to look different depending on what you have. My laptop required me taking off the bottom and unscrewing the hard drive from it’s spot. Then I took the metal piece that secured it to the main machine, removed the actual drive, and replaced it with the SSD. Finally, I replaced the whole unit and put the bottom back on. The entire thing took maybe 10 minutes.
However, I can’t give you recommendations on what to do for your personal computer. You may have a desk top or a laptop. You may have a custom built machine. I do know that whatever your situation may be, there’s a Youtube video for that.
So your next step will be typing into Youtube, “How to remove the hard drive for a EXACT NAME OF COMPUTER HERE.” Someone out there has made an instructional video for you on how to remove your hard drive. Youtube might have a host of weirdness and oddities, but it’s also incredibly informative when you need it.
Finishing Up
Once you have the SSD installed, your instinct will be to close everything back up, but don’t do that. Boot your computer up first. Take a look and make sure everything looks the same. If you’ve clicked on the links up there to Bob Rankin’s page, he gives you some handy tips if Windows decides to get cheeky with you.
Now that you’re sure everything is running smoothly, turn your machine off. If anything inside the mainframe looks dusty, grab a dust cloth and give it a little wipe. Even our computers get dusty. Then make sure to watch the video you researched to make sure you’re closing everything properly. Finally, close it all up and enjoy your new very fast machine.
Tips and Such
Any time you’re handling your own hardware, make sure you read (or watch) the instructions through at least once. It’s that old carpentry adage of measure twice and cut once. It’s much easier to watch a video a second time than to replace the metal piece that holds the hard drive in place (or another example that doesn’t apply to me personally *cough*.)
Second, make sure you do your research on the hardware you’re buying before you buy it. When I purchased the SSD external drive for my MAC, I didn’t realize it was going to come with a USB cable and not a USB-C cable. I had to return it and get another one. It was annoying. Learn from my mistake. It’ll save you time and possibly money to do a few extra minutes of reading.
Finally, if something does go wonky, don’t be afraid to ask for help. You can contact Bob via his blog or reach out to a verified computer support like The Geek Squad. If someone on the internet from an unverified site offers to help you for a fee, you go ahead and pass that up. You know we don’t recommend ever paying suspicious support people.
Now go and enjoy the new speed and efficiency of your SSD as well as the bragging rights to your friends about your obvious tech prowess. And, as always, stay safe out there.
Photo by Vincent Botta on Unsplash