
You’ve heard how great it is, but getting rid of your current operating system is triggering waves of fear up your spine. You know Microsoft likes to move things for no reason, so the thought of spending hours looking for something as simple as My Computer is causing you to balk.
What about a dual boot system? Yeah, that’s the ticket. Can I add Windows 7 to my current Vista or XP setup without completely starting over? The answer in a word is yes. It doesn’t matter what’s already installed. You can have your very own dual boot Windows 7 system in 2 easy steps.
STEP 1.
Partition Hard Drive
Check that there is adequate space on your drive for the addition of a second operating system. The rule of thumb is that you want at least 50% of your drive free in order to get the best performance. Look to be sure you have at least the minimum suggested by Microsoft, 16 gig for Windows 7 32 bit and 20 gig for Windows 7 64 bit. Here’s a link to check your systems specs against Microsoft,s suggested requirements.
To be comfortable, I use double the minimum to allow for storage.
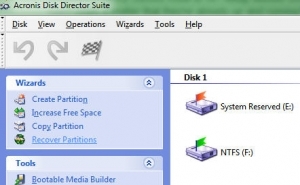
Windows XP is a little tricky because it does not include a partition tool. You will need a partition program to resize your drive. There are several good FREE TRIAL programs available. I like Acronis Disk Director Suite or even the Trial Version of PartitionMagic 8. I also found several people suggesting a program called GParted. Although I’ve never used it, I did download and create the bootable CD for the next time I want to partition an XP system.
Using the partition program of your choice simply select the drive to partition and:
1. Resize the partition to create free space.
2. Create the new partition from the free space.
Windows Vista makes things a little easier. It has included tools to partition the hard drive. To locate the necessary Disk Management tool, go to: Start> Control Panel> System and Maintenance> Administrative Tools> Computer Management> Disk Management.

Once you are in Disk Management, shrink the existing partition to create free space and then create the “New Simple Partiton.
STEP 2.
Install Windows 7
Installation is the easy part. Extremely simple and no tricks like previous versions of Windows. Simply slip the Windows 7 DVD into the drive and reboot your system. If it doesn’t boot to the Installation Disk just enter the bios and set the CD/DVD as First Boot Device. To do this, reboot the system while continuously taping the Delete Key. When you see the bios screen, locate the Boot Order tab which is usually under the Boot heading or Advanced heading. Set CD/DVD as First Boot Device, Save and Exit.
For now there’s nothing to do but follow the installation wizard and select Custom/Advanced as the type of setup. Make sure you are choosing the correct partition so you don’t hose your original installation. Sounds obvious but… Now’s a good time to take a break and do the usual break type things.
You’ll see the usual prompts for setting up your User Name, TimeZone, Password and license key. If you don’t want to use a password, just leave it blank.
I’ve found Windows 7’s first boot has all my drivers installed and is ready to go. No searching for Network drivers and or chipset drives as in XP. In fact, I found it boots to a dual monitor set up just exactly as I would have configured it. I do install other drivers but that’s because I want a particular one, not because I can’t see my screen properly or access the internet.
That’s all there is to it. I’ve installed countless copies of XP and Vista and this is by far the easiest.
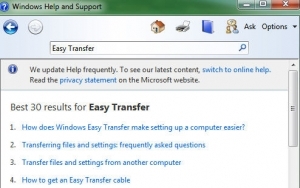
By the way, when you’re ready to go to a single operating system, nothing could be easier than using the Windows 7 Easy Transfer to move all of your files, settings, and information to the new installation. You may want to use it just to get going in Windows 7 after the installation. To access this within Windows 7 go to: Start> Help and Support> Type in Easy Transfer and see the screen shown above.
Enjoy!
__________________________________
HELPFUL LINKS