By Ellen Finkelstein
How to resize and crop pictures in PowerPoint
I’ve discovered that some people don’t know how to resize images in PowerPoint and also don’t know how (or when) to crop an image. These are basic and important skills and you’ll use them even in other programs, because they are universal.
How to resize an image
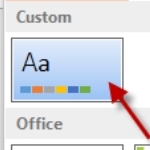
Sometimes you insert an image and it’s the wrong size. You resize an image when it’s the right shape/proportion, but just the wrong size. To resize an image select it so that you see “handles” on the corners and sides. The image to the right has an arrow pointing to one of the handles.
Then click and drag a corner handle inward or outward.

ALWAYS USE THE CORNER HANDLES TO RESIZE AN IMAGE! The side and top handles are useless and should not exist. Using a side or top handle will distort the image and make your people look fat or undernourished. Just say no to the temptation and read on below where I explain what to do if the shape of your image needs to be adjusted.
If you resize an image too much, especially to make it larger, you run the risk of losing resolution. The image will look grainy (and unprofessional). Check your images in Slide Show view to see if they are still clear. If not, find a different image that has more pixels.
In the image to the right, the proportion is good; only the size is too big So, I moved it to the lower-right corner of the white area and used the upper-right corner handle to make the image a little smaller. Here’s the result.
Article continued here
This excerpt is shared with permission from ellenfinkelstein.com.